Automated build of UWP app for pull-request
Visual Studio 2019 improved build of UWP applications for Windows 10. Good news is that it is possible to build the project without need for temporary certificate. This is useful for automated builds validating pull requests. When validating pull-request, I simply build the project without creating APPX package. In Visual Studio 2017 this used to fail because of missing certificate to sign the package. So I had to create a self-signed certificate. However, in Visual Studio 2019 no APPX package signing is done by default, and thus no certificate is needed.
You just have to make sure that there is NOT line in you .csproj:
<AppxPackageSigningEnabled>True</AppxPackageSigningEnabled>
Then it is possible to run build in Azure DevOps using following YAML snippet:
  - task: VSBuild@1
    displayName: 'Build solution (UAP)'
    inputs:
      solution: 'MyWindowsAppSolution.sln'
      platform: 'x86'
      configuration: 'Release'
This is how I build my pull-request builds without any APPX packages.
Automated build of UWP app for release
There is nice tutorial about setting up automated builds for your UWP app. It explains all needed MSBuild properties, which need to be configured. So I am not going to repeat it in my blog. However, it does not explain how to create certificate for signing the application.
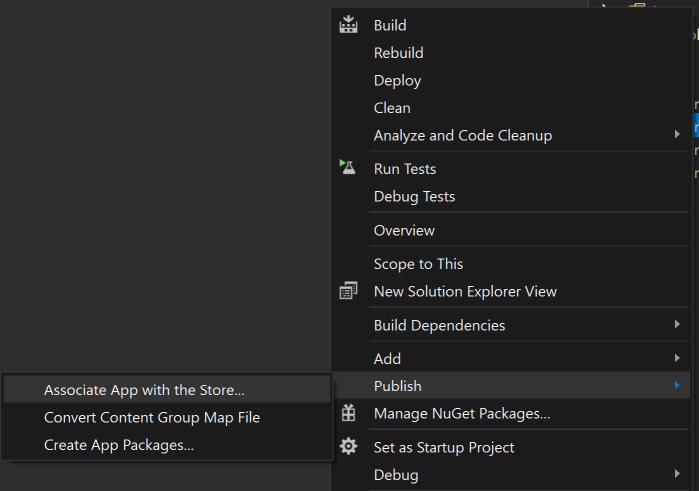
So I did, what I used to do before. I associated Visual Studio project with app in Store. Right-click the project and select Publish -> Associate App with the Store...
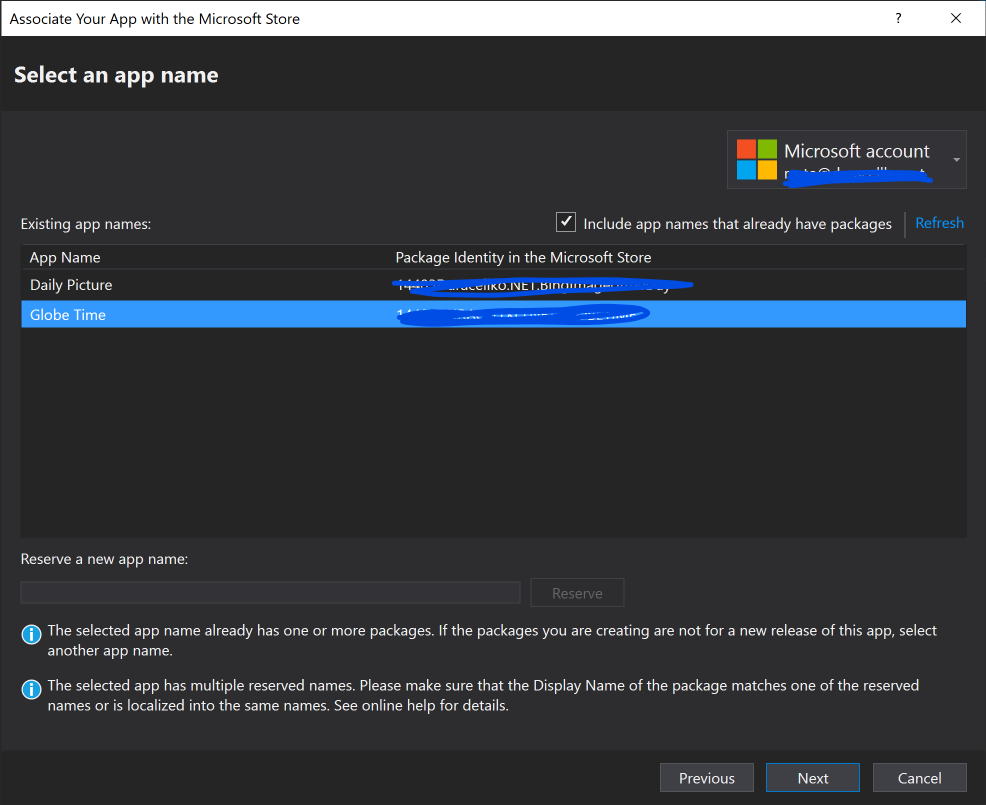
And then I selected app to associate the project with.
A new certificate was automatically created. The certificate can be used to sign the app for publishing in Windows Store. New approach in Visual Studio 2019 is that the certificate is stored in certificate store, instead of a file in the project folder. So I had to export the certificate. I opened app package manifest (Package.appxmanifest) in Visual Studio. Then I opened tab Packaging.
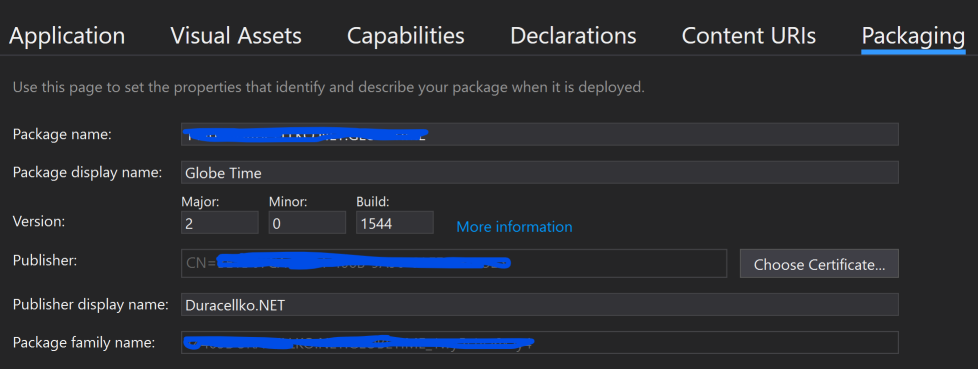
Then I clicked Choose certificate and then View Full Certificate.
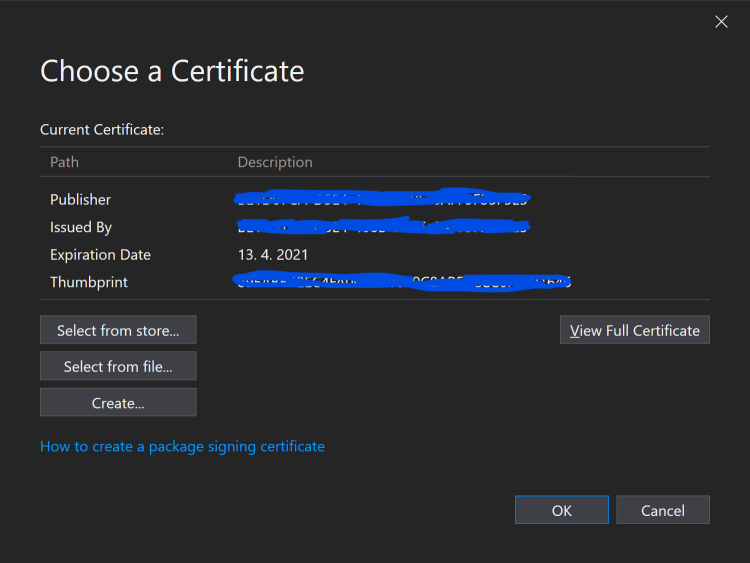
Then in Details tab I clicked Copy to File.... I selected file name and password to protect the certificate.
I uploaded the certificate to Azure DevOps secure files library as decribed in Set up automated builds for your UWP app. I updated my build pipeline according to the instructions. Unfortunatelly the build failed with error that the certificate was not valid for signing.
##[error]C:\Program Files (x86)\Microsoft Visual Studio\2019\Enterprise\MSBuild\Microsoft\VisualStudio\v16.0\AppxPackage\Microsoft.AppXPackage.Targets(4573,5): Error APPX0107: The certificate specified is not valid for signing. For more information about valid certificates, see http://go.microsoft.com/fwlink/?LinkID=241478.
What was very strange that the build with the same parameters worked on my machine. I tried to export the certificate in different ways, but nothing helped. So I decided to restore my old PowerShell script to generate signing certificate.
# Creates new PFX certificate for signing Windows app

param (
    [string] $Path,
    [string] $Password,
    [string] $Subject
)

$basicConstraints = [System.Security.Cryptography.X509Certificates.X509BasicConstraintsExtension]::new($false, $false, 0, $true)

$enhancedKeyUsageOidCollection = [System.Security.Cryptography.OidCollection]::new()
$enhancedKeyUsageOid = [System.Security.Cryptography.Oid]::new("1.3.6.1.5.5.7.3.3", "Code Signing")
$enhancedKeyUsageOidCollection.Add($enhancedKeyUsageOid) | Out-Null
$enhancedKeyUsage = [System.Security.Cryptography.X509Certificates.X509EnhancedKeyUsageExtension]::new($enhancedKeyUsageOidCollection, $true)

$args = @{
    Subject = $Subject
    CertStoreLocation = 'Cert:\CurrentUser\My'
    KeySpec = 'Signature'
    Extension = @($basicConstraints, $enhancedKeyUsage)
    KeyUsage = 'DigitalSignature'
    NotAfter = [System.DateTime]::UtcNow.Date.AddYears(1)
    HashAlgorithm = 'SHA256'
}
$certificate = New-SelfSignedCertificate @args
$thumbprint = $certificate.Thumbprint
$pfxData = $certificate.Export([System.Security.Cryptography.X509Certificates.X509ContentType]::Pfx, $Password)
Set-Content -Path $Path -Value $pfxData -Encoding Byte | Out-Null
Remove-Item "Cert:\CurrentUser\My\$thumbprint" -Force | Out-Null
Write-Output $thumbprint
The script has 3 parameters:
- Path - File path, where the certificate should be saved (e.g. Duracellko.pfx).
- Password - Password to protect the certificate.
- Subject - Application publisher subject. It can be found in Package.appxmanifest file in
Publisherattribute inIdentityelement. e.g. CN=4962602C-A580-4CC1-BCB4-C2958C9CC70E
You can generate new certificate by saving the PowerShell script above into file CreateUapCertificate.ps1 and then executing following PowerShell command:
$password = Get-Clipboard
.\CreateUapCertificate.ps1 -Path MyCertificate.pfx -Password $password -Subject 'CN=4962602C-A580-4CC1-BCB4-C2958C9CC70E'
The script creates new certificate and writes certificate thumbprint that can be used as MSBuild property.
Important! The PowerShell script works only in Windows PowerShell. It does not work in PowerShell Core.
I uploaded the certificate file to Azure DevOps and configured MSBuild properties in the pipeline. And the new certificate worked and build was successful.