This is 3rd post in my series about experience with Wyam. This post is about setting up continuous deployment of static web site generated by Wyam. I am using Azure DevOps for deployment.
Define Azure Pipeline
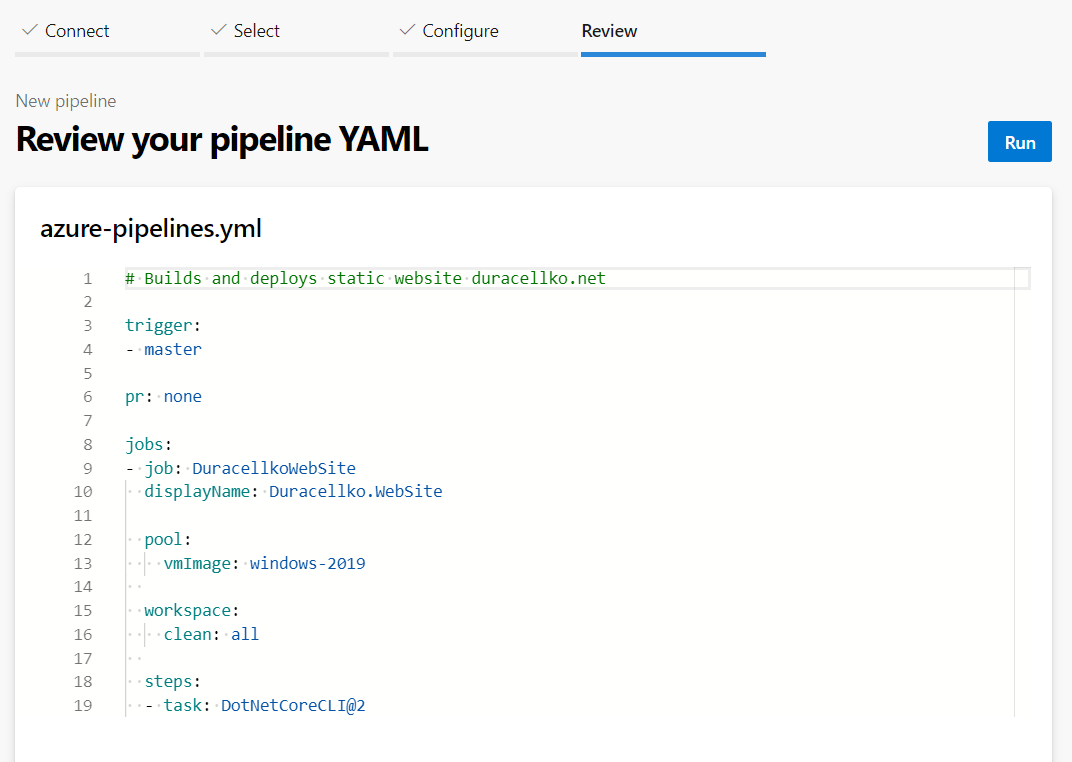
At first it is needed to define build pipeline. This is done by adding file named azure-pipelines.yml into the repository with Wyam web site. The azure-pipelines.yml is YAML file that defines Azure DevOps pipeline. The file must follow YAML schema for Azure Pipelines. It may be overwhelming at first, so let's look at it step by step.
First part defines that pipeline should be executed on any push into master branch. And it should not be executed, when a pull request is created. This policy works for me as I am the only author of the website and follows trunk-based development. However, if your team is bigger or you maintain open-source website with contributions, then you may need to setup some pull-request policies.
trigger:
- master

pr: none
Then job part is included. The pipeline contains single job. The job is executed on Windows Server agent with Visual Studio 2019. It's possible to find list of all avilable Azure DevOps hosted agents. The job also cleans all build directories before start. This is not necessary, because hosted agents are cleaned for every build. I just have this preference from using on-premise build agents.
jobs:
- job: DuracellkoWebSite
  displayName: Duracellko.WebSite

  pool:
    vmImage: windows-2019

  workspace:
    clean: all
Last and the most important part of the YAML file are job steps. First step installs Wyam dotnet global tool. Basically it executes following command: dotnet tool install -g Wyam.Tool
  steps:
  - task: DotNetCoreCLI@2
    displayName: Install Wyam
    inputs:
      command: custom
      custom: tool
      arguments: install -g Wyam.Tool
Next step is to generate static website. This is simple, assuming that the website is in root folder of the repository. Just run wyam command. It generates static website in output folder.
- script: wyam
Next 2 steps ZIP the website (output folder) and publish it into build artifacts.
  - task: ArchiveFiles@2
    displayName: ZIP output
    inputs:
      archiveType: zip
      rootFolderOrFile: $(Build.SourcesDirectory)/output
      archiveFile: $(Build.StagingDirectory)/web.zip
      includeRootFolder: false
      replaceExistingArchive: true

  - task: PublishBuildArtifacts@1
    displayName: Publish artifact
    inputs:
      PathtoPublish: $(Build.StagingDirectory)
      ArtifactName: web
And last step uploads the website to server using FTPS, where it is hosted by web hosting provider. YAML file does not contain connection details for FTP server. Surely no one wants to publish this secret information in public Git repository. It just refers to server endpoint that contains this information. The endpoint will be created later.
  - task: FtpUpload@2
    displayName: Upload to duracellko.net-FTP
    inputs:
      serverEndpoint: 'duracellko.net-FTP'
      rootDirectory: $(Build.SourcesDirectory)/output
      remoteDirectory: /
      preservePaths: true
      clean: false
      cleanContents: true
      trustSSL: true
The step deletes all files and subfolders from root folder of FTP site. Then it uploads content of output folder including subfolders.
Full azure-pipelines.yml can be found in GitHub repository.
Setup Azure DevOps project
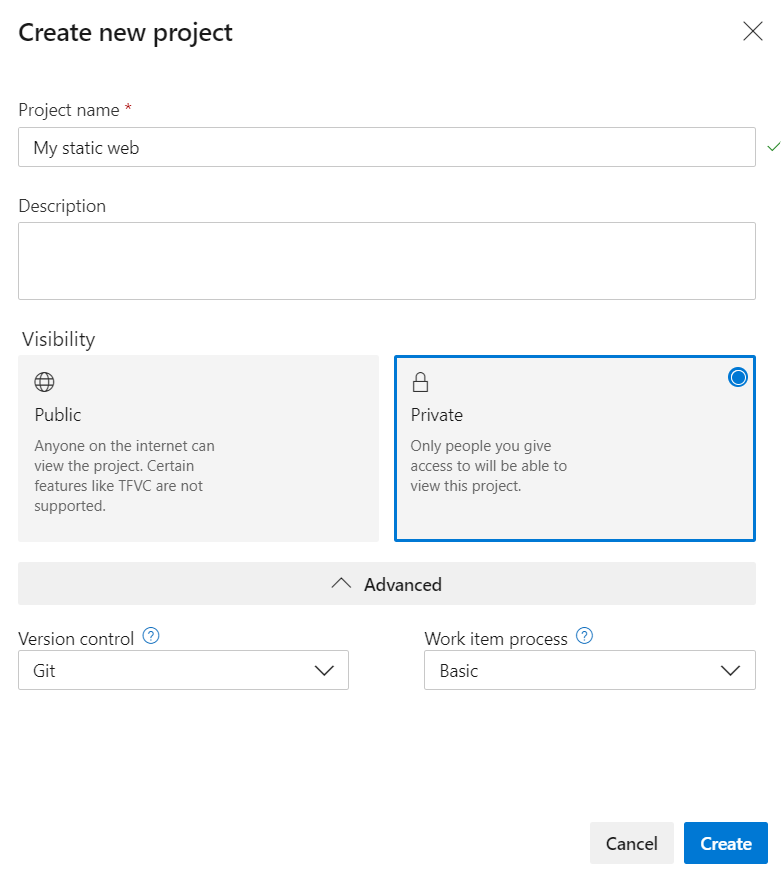
When azure-pipelines.yml file is in the repository, it's time to execute the deployment. I assume, you have already setup Azure DevOps organization. If not, you should start by setting up new Azure DevOps account for free. Then it's neccessary to create new Azure DevOps project. Also existing project can be used. At Azure DevOps organization home page click New project. Enter name of the project (e.g. My static web). In advanced options select following settings:
- Version control: Git
- Work item process: Basic
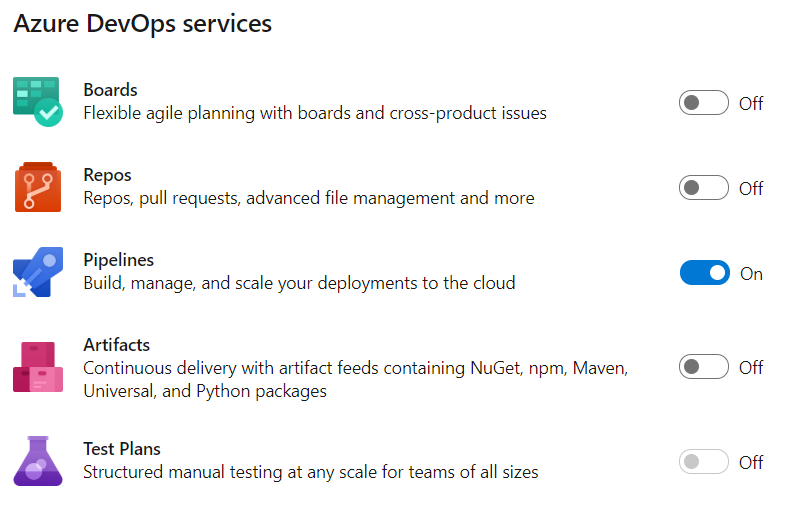
When project is created, open project settings. You can disable all Azure DevOps services except Pipelines. They won't be needed.
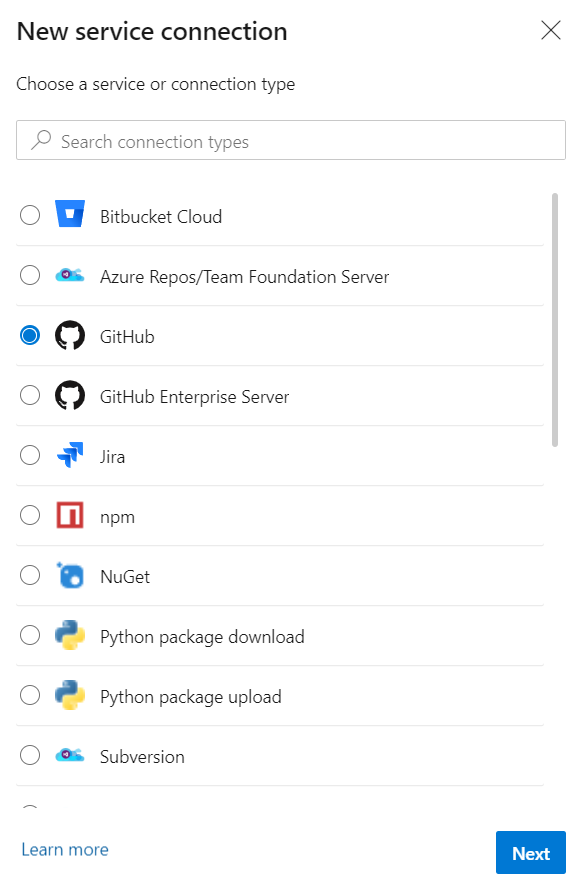
Then project needs to connect to GitHub repository with the Wyam website. Open Service connections settings and click Create service connection. Select GitHub service and click Next.
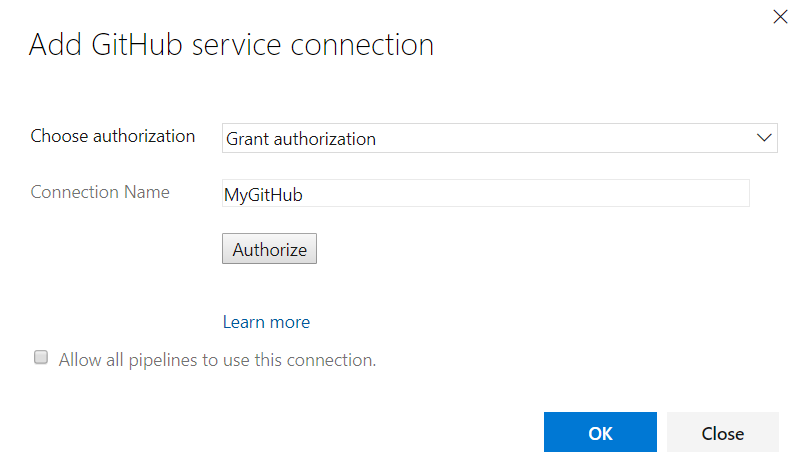
Enter connection name (e.g. MyGitHub). And click Authorize. Assuming you are logged into your GitHub account, the Azure DevOps project gets authorized to access your GitHub account. Click OK to save the Service Connection
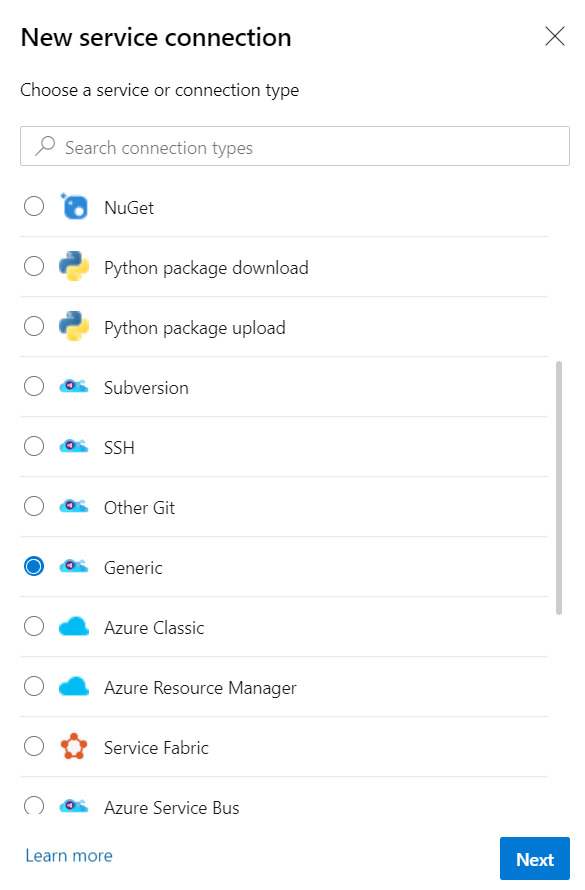
Then it's needed to create a connection to FTPS server, where the website should be uploaded. Again click New service connection. Select Generic and click Next.
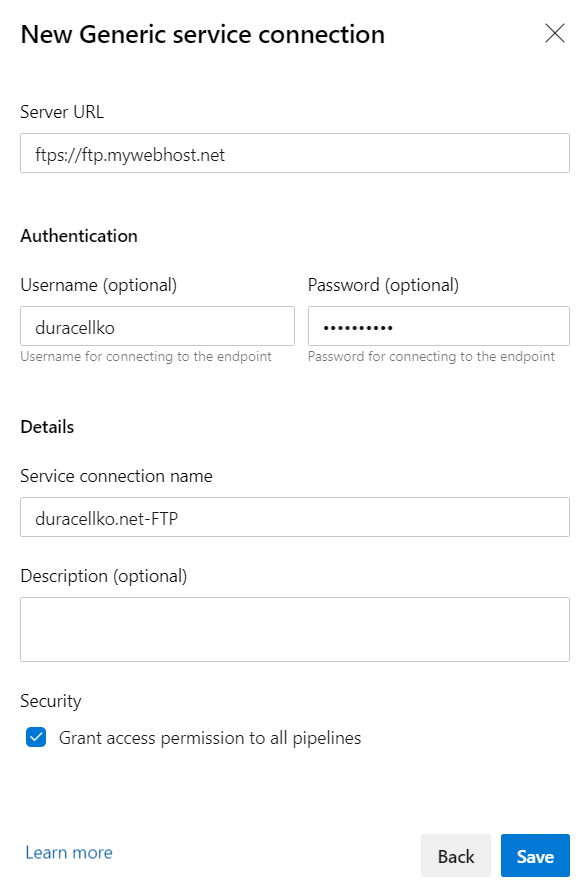
Enter connection details to your FTP server:
- ServerURL: URL of FTP server (e.g. ftps://ftp.mywebhost.net).
- Username: Username for connecting to the FTP server.
- Password: Password for connecting to the FTP server.
- Service connection name: Name of server endpoint that you specified in the YAML file (e.g. duracellko.net-FTP)
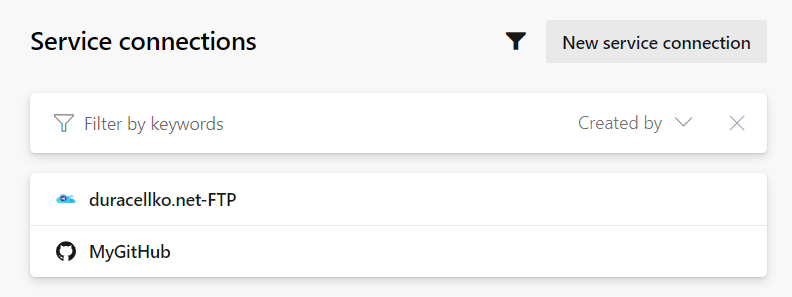
Now there should be 2 service connections.
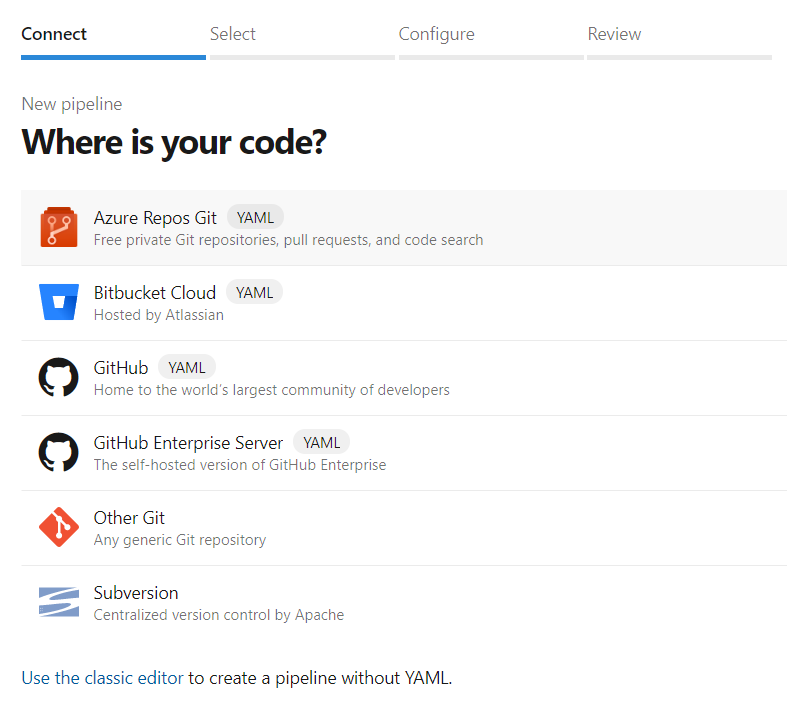
And finally it's possible to start build and deployment. From left menu open Pipelines. Then click Create Pipeline. Select GitHub repository.
Then select repository with the Wyam website. azure-pipelines.yml file is found, so you can simply start deployment by clicking Run.
If everything was set correctly then build should finish successfully.
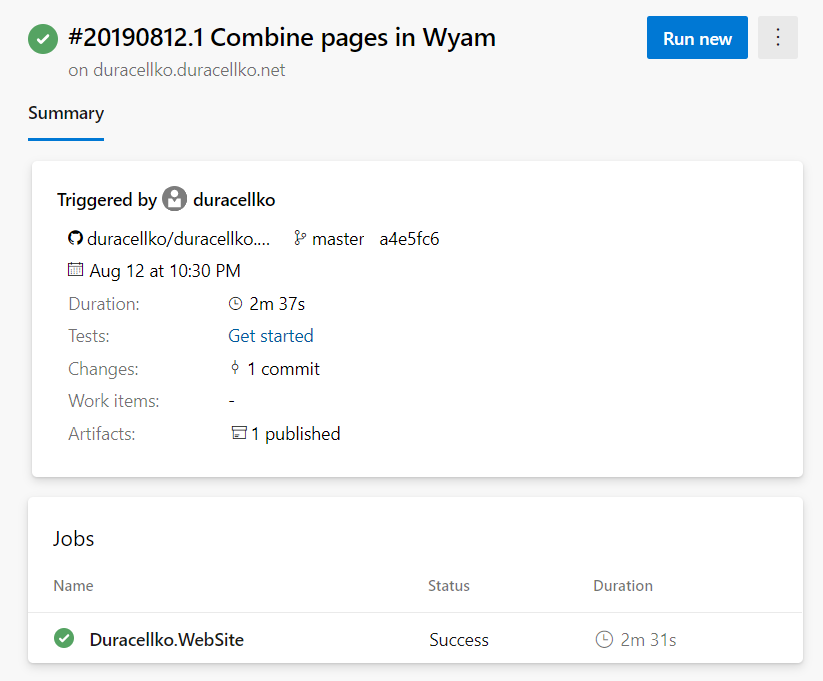
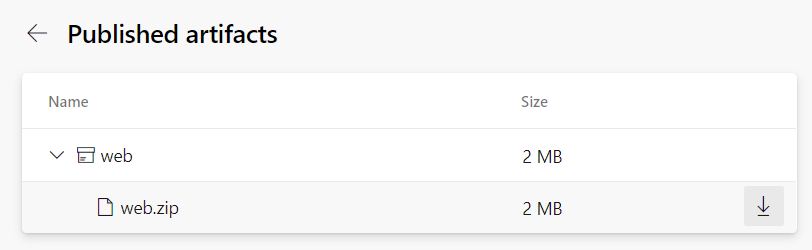
Website should be deployed to the webhosting server. And it should be possible to download it from Build artifacts.
From now on, whenever you push any change into matser branch, the website is generated and uploaded to the webserver.
PS: Be aware that website is generated on Microsoft hosted agent that has configured UTC time zone. It means that a fresh new blog post may not be published because of different time zone. For example, you are in New Zealand time zone (UTC+12). It's 8:00 in morning on August 21st, you did final review of the blog post and set publish date to August 21st. And push everything to master branch. Then build agent builds the website, but its local time is August 20th 19:00. And Wyam generator works the way that blog posts with publish date after this time are not published. So the newest post with publish date August 21st simply does not get out.
There is already Wyam enhancement suggestion to make time of generating Wyam website configurable. This way, it would be possible to override local time zone of build agents.